Kodil repository has hundreds of add-ons which are very popular and consist of movies, TV shows, live channels, etc. We will provide you a source for Kodil repo and show you how to install it on Kodi and explore further. Kodil repository contains more than 100 add-ons in various categories and is popular in the United States, Canada, and the United Kingdom.
Let us now show you how to install Kodil repo. First, check if the installation of unknown sources is enabled in Kodi settings. So follow these simple steps to check that:

- Open Kodi and then open left menu from its home screen.
- Click on the gear like settings icon on the top of the menu and open settings page.
- Click on ‘system settings’ option.
- Click on ‘add-ons’ option on the next page.
- Turn ‘unknown sources’ option on to let Kodi allow installation from unknown sources. Now we are ready to start the installation of Kodil repo.
How to Install Kodil Repo on Kodi
- Head over again to the home screen and click settings icon.
- On the next page, click on ‘File manager’.
- When you see an option to add a source like below, click on that to add a link.
- Click on ‘<None>’ on the next screen to add a link.
- Now enter the link or address to the source of Kodil repo, that is http://kdil.co/repo/
- In the space seen below, enter the name of media source as Kodil.
- Go back to home screen and click ‘add-ons’ from the left menu.
- Click on the box like icon at the top.
- Now you will land on ‘add-on browser’ page as seen below.
- Click on ‘install from zip file’.
- When you see the name of a media source that you entered earlier, click on that.
- Now click on the zip file name that you see, it should be Kodil.zip
- When you click ok, Kodi will start installing the repository. You will soon see an ‘add-on installed’ notification.
You are done. The Kodil repo 2019 is now installed on Kodi, now you can install add-ons that you like by following below steps:
- Click on ‘install from repository’.
- Then click ‘www.kodisreal.co.il repository’.
- Click on ‘video add-ons’ from the list of available options.
- Click on the name of the add-on that you want to install.
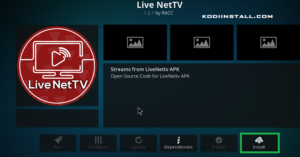
- Click on ‘install’ button on next screen.
- Kodi will install it and notify you once installed.
Once an add-on is installed, you can go back to the home page and from the left menu, click on add-ons option again to see the name of new add-on.
We have now completed the complete demonstration and guide of installing Kodil repository on Kodi and we hope that you will not face any issues while doing the same. Please share this article with your friends to keep supporting us as always and also to help them. We will come up with more similar articles shortly, so install Kodil repo and enjoy its add-ons until then.


